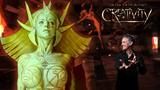
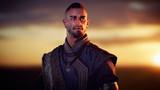


Alexander breaks down his thought process for creative problem-solving, from initial concept and inspiration to final renders. Artists will learn tips and techniques spanning character sculpting, rig setup, keyframe animation, frame sculpting, lighting and rendering, and compositing. Drawing from his expertise as a senior technical artist working in the video game and visual effects industries, he also shares his thoughts on creating production-ready animation tools to improve workflow efficiency.
This workshop is intended for intermediate- to advanced-level artists, particularly those familiar with sculpture and animation workflows. Prior experience is recommended in both ZBrush and an animation software of choice. While Maya is used for this workshop, and the provided tools are Maya-specific, the fundamental concepts can be applied in other packages such as Blender or Houdini. Beginner artists will also find value in the early chapters, where a simple animation workflow is presented using only a limited set of features already present in ZBrush.
Software used for this project includes ZBrush, Maya, and Blender. Alexander's proprietary UltraClay animation tool is also provided to all Gnomon Workshop subscribers, along with a detailed installation tutorial. Finally, a custom ZBrush menu is also included in the Project Files, providing easy access to the most commonly used ZBrush features.
12 Lessons
In this first lesson, Alexander Lee discusses setting up custom menus in ZBrush, which will assist the process both for initial character sculpting and final frame sculpting. The "quick menu" provides easy access to common functions such as brush settings, automasking, mesh modification options, Sculptris, DynaMesh, and more. He also shows how to set up a custom menu for selecting a subset of brushes, such as Snakehook, Inflate, DamStandard, and ClayBuildup.
Duration: 20m 47s

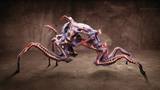
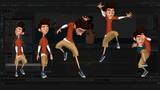
In lesson 2, Alexander covers creating a basic Claymation in ZBrush, using the principle of Subtools as frames. Each frame of animation is a separate mesh. He shows how to switch between them using hotkeys to move up and down the Subtool stack. He also discusses using Sculptris in an animation context, and how to append previously completed sculpts to your animation Subtool stack.
Duration: 32m 5s

In lesson 3, Alexander provides an overview of his material and color texture pipeline. Using PolyPaint in ZBrush, he shows how to set up material and lighting settings to accurately match the final rendering color space in Maya. He then demonstrates direct one-to-one visual comparisons to ensure that the colors painted in ZBrush will be representative of the final animation result.
Duration: 24m 24s

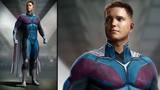
In lesson 4, Alexander covers the thought process when designing a new animated shot. He shows how to block out initial poses using character rigs in Maya, and how to test out some of the simple transitions and movement. Then he sculpts and PolyPaints the main character, using existing basemeshes from previous projects. Finally, he demonstrates how to set up a character rig in Maya using the RapidRig Modular auto-rigging tool.
Duration: 32m 19s

In lesson 5, Alexander discusses the usage of PureRef for image reference, the coverage to look for when finding photo versus artwork reference, and techniques for avoiding AI-generated images in Google search and other image search engines. He also discusses the role of reference versus imagination when creating an animated shot from scratch.
Duration: 5m 6s

In lesson 6, Alexander covers the sculpting process for the large hands in the animated shot. Starting from an existing hand sculpt, he teaches how to change proportions and re-sculpt secondary forms before tackling a final pass for tertiary forms and details, and the Polypaint coloring. Finally, he demonstrates how to rig the final hand mesh in Maya using RapidRig Modular.
Duration: 40m 56s

Lesson 7 dives into the animation process in Maya, starting with blocking poses and then beginning the straight-ahead animation process. Alexander demonstrates how to set up multiple camera views, including one with the final render perspective. He shows how animating “to-camera” allows artists to work efficiently, by ignoring viewpoints that will not be seen in the final result.
Duration: 28m 15s

Lesson 8 continues the animation process in Maya, adding inbetweens, fixing arcs, retiming, and polishing. Alexander also teaches how to add pose-specific corrective blendshapes. He shows how correcting broken deformations at this stage helps to eliminate repetitive frame-sculpting in ZBrush at the next stage. He then uses the Maya Shape Editor to add the blendshapes, and set keyframes on the envelope for each target.
Duration: 31m 5s

In this ninth lesson, Alexander covers the first pass of ZBrush frame sculpting. First, the animated meshes are exported from Maya using his proprietary pipeline tool UltraClay. He then shows how they are imported into ZBrush for the sculpting process to begin. In the first stage, he shows how to set up Polygroups for the independent objects before moving the major forms into place using the Gizmo and SnakeHook brush.
Duration: 28m 58s

In this tenth lesson, Alexander continues the frame-sculpting process in ZBrush. He shows how to use tools like Gizmo Union and Sculptris Pro to create smooth transitions between objects, and how to refine the animation using a variety of smoothing and remeshing techniques. He also demonstrates how to use UltraClay to import the sculpted animation frames into Maya to check timing and spacing with incremental playblasts.
Duration: 30m 39s

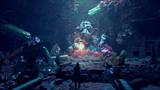
In this final lesson, Alexander concludes his claymation workflow. With the final sculpted frames imported into Maya, he shows how to set up the material and rendering settings. He also discusses his lighting set up, providing techniques to help artists control the spread of light to focus attention on the central action in the animation. Lastly, he shows how to render the animation and composite the image sequence in Blender.
Duration: 20m 25s

In this bonus lesson, Alexander provides a quick tutorial on installing and using UltraClay, which is utilized in the workshop to manage claymation frames in Maya and ZBrush. In this lesson, he discusses installation and setup, tips and tricks for best performance, and covers a full export > frame sculpt > import demo in real-time.
Duration: 30m 59s

Primary tools
For this workshop you’ll need:
Project Files
This workshop provides artists with access to the project file Alexander Lee uses in this workshop to support the learning process. Artists will have access to:
anim-control-ui: Animation control picker tool
UltraClay: full installation tutorial file
zbrush-setup: Custom menus, hotkeys, and materials for ZBrush
Skills Covered
Who’s this Workshop for?
This workshop is intended for intermediate to advanced artists comfortable with animation and sculpting workflows. Proficiency in both ZBrush and Maya is recommended, but Maya can be replaced with other animation software, such as Blender or Houdini.
Artists of any level can jump straight into basic animation in ZBrush using the steps presented in the early chapters. Alexander teaches the same basic technique in an introductory ZBrush college class, supporting students to produce detailed animations with no prior digital sculpting experience.
Learning Outcomes
- Sculpt a character mesh in ZBrush
- Set up a character rig using an auto-rigging tool
- Animate in ZBrush using straight-ahead animation and stepped keys
- Set up materials for rendering and viewing vertex colors in the viewport
- Manage export/import of frame meshes using UltraClay
- Sculpt individual animation frames in ZBrush using Sculptris Pro
- Render a final animation in Maya
- Handle compositing in Blender


